Link to the CRTC Do Not Call List web site: www.lnnte-dncl.gc.ca
In order for Telelisting to identify the numbers that you can or cannot call in our phonebook, you are required to have a valid Do Not Call List registration and have paid the required fees per area code to the CRTC so that we can integrate your subscription into our phonebook.
We strongly suggest that you take the time to familiarize yourself with the rules concerning the Do Not Call List. Click here for more information on this.
Do Not Call List Setup in Telelisting
Telelisting can automatically download and integrate your Do Not Call List in your phonebook. This will allow you or your employes to know exactly at all time, which number they can call. In order for Telelisting to automatically download your Do Not Call List, we require the following 3 details from your Do Not Call List Subscription.
- The Registration Access Number:
- The Subscription Access Number
- The Download Key
First, Register your company as a Telemarketer with the CRTC
You need to complete your company registration as a Telemarketer (this should be done by the company you are working for). You can register at the following web site: Register Your Organization
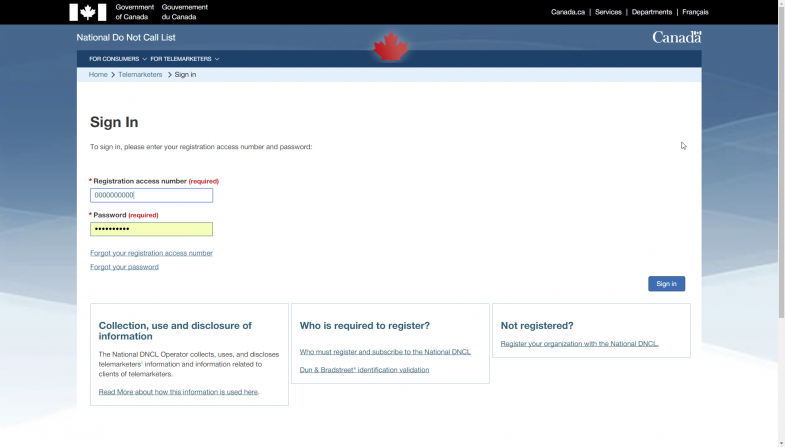
Login to your DNCL account
The Registration Access Number is your main identification to the Do Not Call List. It is the number you use to login into the DNCL Portal. It was transmitted to you when you first sign in to the DNCL.
Once you have this number in hand, log into you DNCL list account at www.lnnte-dncl.gc.ca and go to ‘Access Subscription’.
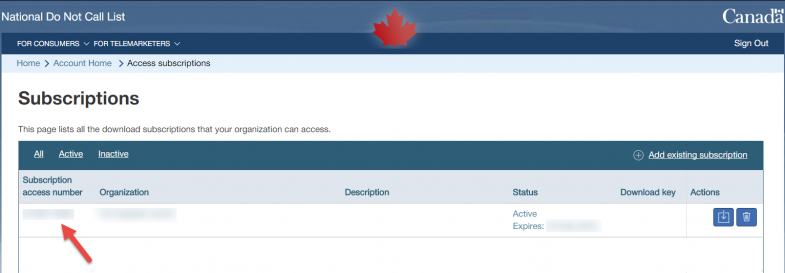
The Subscription Access Number
This is the number that correspond to your current subscription for area code. You can find it by login in your account. and by clicking on ‘Access Subscription’.
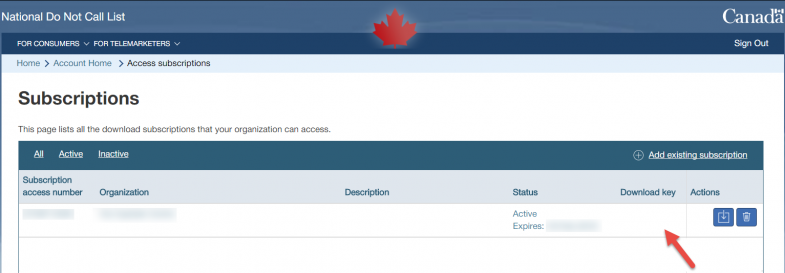
The Download Key
The download key will give us access to downloading your DNCL Subscription for you. You can find it under the ‘Download key’ column.
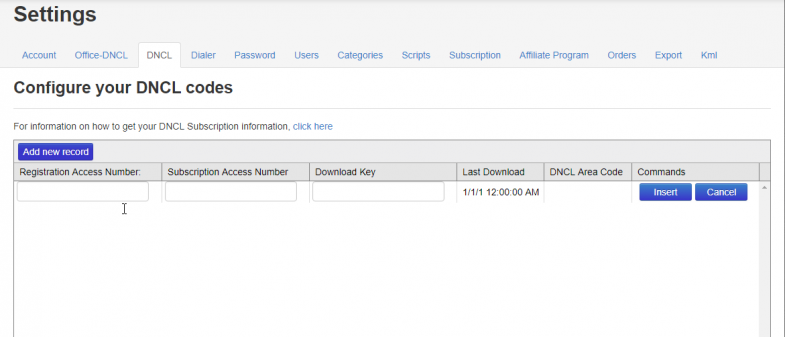
Setting them up in telelisting
Once you have those 3, logon to your Telelisting account, Go to ‘Account Settings’ by clicking on your name at the top, then select ‘Settings’.
Fill in the information in the ‘DNCL’ section and click on ‘Insert’.